
Ceiling cracks can alarm any homeowner in Dallas–Fort Worth, but understanding their causes and knowing the right repair steps can restore your ceiling's appearance and protect your home's value. Most cracks are cosmetic and manageable with DIY methods, while wider or growing cracks may signal structural issues requiring professional attention. This guide walks you through identifying crack types, gathering materials, executing repairs with proper technique, and recognizing when expert help is essential for lasting results.
Table of Contents
- Key takeaways
- Understanding ceiling cracks: causes and when to act
- Preparing for repair: tools, materials, and safety tips
- Step by step guide to repairing minor ceiling cracks yourself
- Troubleshooting and when to call a professional
- Finishing touches: painting and maintaining your repaired ceiling
- Reliable drywall repair and painting services in Dallas–Fort Worth
- FAQ
Key Takeaways
| Point | Details |
|---|---|
| Cosmetic cracks are common | Most ceiling cracks are cosmetic and can be repaired with DIY methods. |
| Wider cracks signal structural issues | Wider or growing cracks, or those longer than 12 inches, should be evaluated by a professional. |
| Prep and layering matter | Proper surface prep including cleaning, taping, and applying multiple coats of joint compound followed by primer and ceiling paint yields a durable repair. |
| Seasonal monitoring in DFW | In the Dallas Fort Worth area seasonal humidity and weather changes warrant inspecting ceilings after heavy rain or drought to catch cracks early. |
| Paper tape preferred | Use paper drywall tape rather than mesh for stronger joints when embedding in wet compound. |
Understanding ceiling cracks: causes and when to act
Ceiling cracks develop from various sources ranging from harmless cosmetic issues to serious structural problems. Common causes include house settling, truss uplift, poor drywall installation, humidity changes, water damage, foundation issues, and heavy loads. Identifying the root cause helps you decide whether a DIY fix will hold or if you need professional assessment.
Measuring your crack accurately determines the repair approach. Use a ruler to check width and length. Cracks wider than 1/8 inch or longer than 12 inches often need professional evaluation. Hairline cracks that run straight along drywall seams usually indicate tape failure or minor settling. Spider web patterns suggest foundation movement. Sagging sections with cracks point to water damage or structural failure.
Dallas–Fort Worth's expansive clay soils create unique challenges. These soils expand when wet and contract during dry periods, causing foundation shifts that translate to ceiling cracks. Seasonal humidity swings amplify this movement. Monitor your ceilings after heavy rains or drought periods to catch new cracks early. If you notice recurring cracks in the same location despite repairs, the underlying cause likely needs addressing before cosmetic fixes will last.
Pay attention to crack patterns and accompanying signs. Horizontal cracks near exterior walls may indicate truss uplift from temperature differences between attic and living spaces. Stair step cracks suggest foundation settlement. Water stains, discoloration, or soft drywall around cracks signal moisture problems that must be resolved first. For guidance on more extensive damage, review ceiling hole repair guidelines to understand when patching moves beyond simple crack filling.
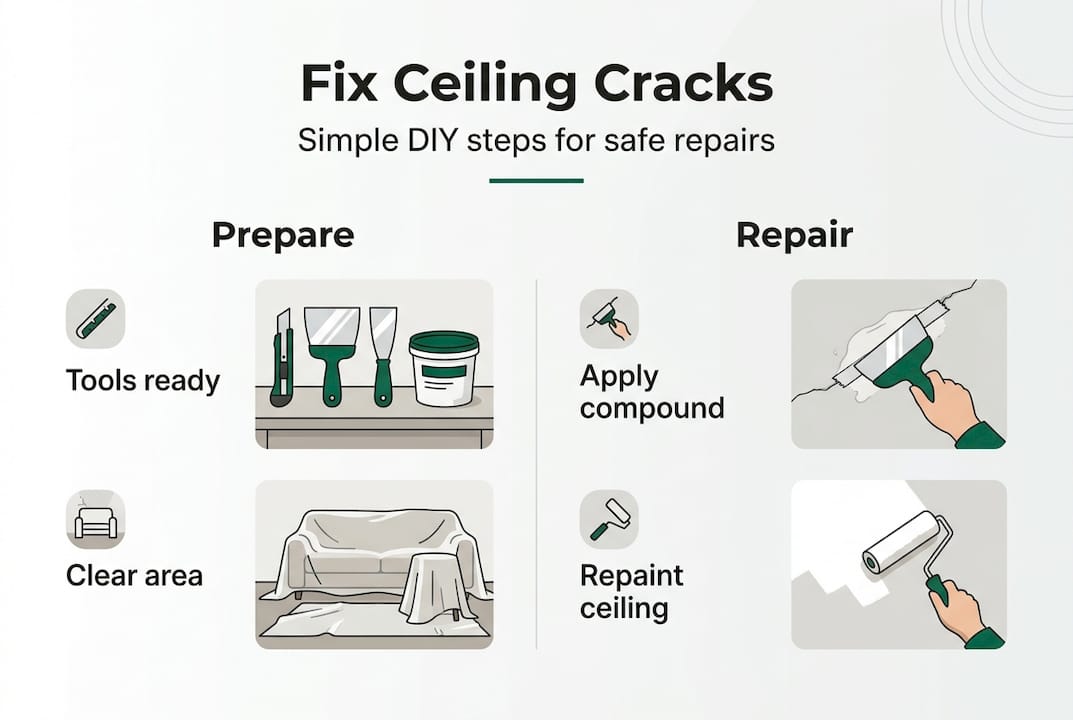
Preparing for repair: tools, materials, and safety tips
Gathering the right supplies before starting saves time and frustration. You'll need a utility knife for cutting, a stable ladder tall enough to work comfortably, drop cloths to protect floors and furniture, a sanding block or pole sander, joint compound, drywall tape (paper or mesh), primer, and ceiling paint matching your existing finish. A putty knife set with 4 inch, 6 inch, and 10 inch blades lets you feather compound smoothly at different stages.
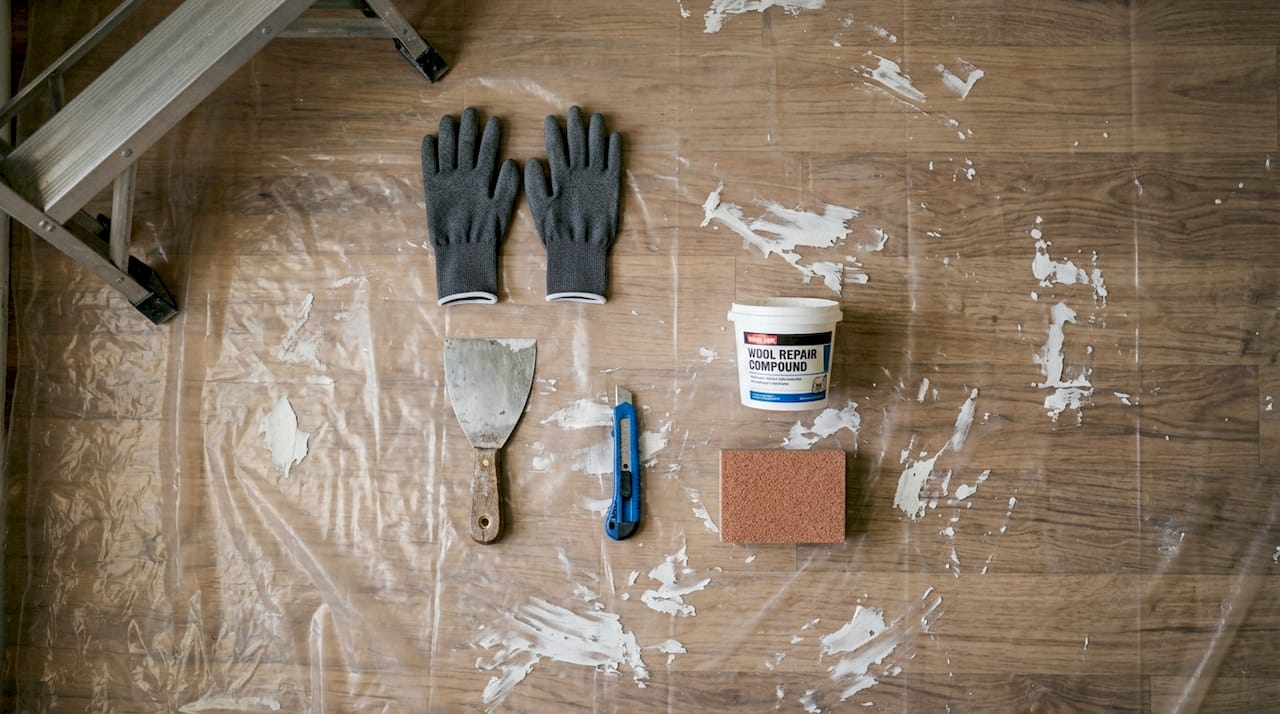
DIY repair costs $70 to $150 and involves simple tools to prepare space, clean cracks, apply compound and tape, sand, and paint. Budget for quality joint compound rather than the cheapest option. Lightweight all purpose compound works well for most ceiling repairs and sands easily. For deeper cracks, consider setting type compound for the first coat, then finish with lightweight compound.
Safety matters when working overhead. Use a sturdy ladder with a wide base and non slip feet. Never stand on the top two rungs. Position the ladder so you can reach your work area without overreaching or leaning. Wear safety glasses to protect eyes from falling debris and dust. A dust mask is essential during sanding to avoid inhaling fine particles. Open windows for ventilation and consider using a box fan to direct dust outside.
| Material | Purpose | Approximate Cost |
|---|---|---|
| Joint compound (gallon) | Fill and smooth cracks | $15 to $25 |
| Drywall tape (roll) | Reinforce repair | $5 to $10 |
| Primer (quart) | Seal repair before paint | $10 to $15 |
| Ceiling paint (gallon) | Match existing finish | $25 to $45 |
| Sanding supplies | Smooth compound layers | $10 to $20 |
| Drop cloths and tools | Protect space and apply materials | $15 to $35 |
Pro Tip: Choose paper drywall tape over mesh for ceiling repairs if you're new to the process. Paper tape creates stronger joints when embedded properly in wet compound and resists bubbling better than mesh, giving you more forgiving results as you learn proper technique.
Clear the room as much as possible. Move furniture away from the repair area or cover it completely with plastic sheeting. Dust from sanding travels farther than you expect. Tape drop cloths securely to prevent tripping hazards. For additional preparation strategies and safety considerations, explore home repair guides that cover various interior projects.
Step by step guide to repairing minor ceiling cracks yourself
The standard DIY repair method involves 6 key steps including preparation, cleaning, applying joint compound, embedding tape, feathering multiple coats, sanding, priming, and painting. Following this sequence ensures repairs blend invisibly with surrounding surfaces.
-
Prepare your workspace thoroughly. Lay drop cloths over floors and any remaining furniture. Set up your ladder in a stable position. Gather all tools within easy reach so you won't need to climb down repeatedly. Good lighting helps you see imperfections as you work.
-
Clean and widen the crack slightly. Use a utility knife to cut a shallow V groove along the crack, removing any loose drywall or old tape. This creates a clean channel for compound to grip. Brush away dust with a dry paintbrush or vacuum with a brush attachment. The crack edges should feel solid, not crumbly.
-
Apply the first bedding coat of compound. Load your 4 inch putty knife with joint compound and press it firmly into the crack, filling the V groove completely. Smooth the surface but don't worry about perfection yet. This coat anchors the tape and fills the void.
-
Embed drywall tape while compound is wet. Cut paper tape to length, allowing 2 inches beyond each crack end. Center the tape over the wet compound and press it in with your putty knife, working from the center outward to squeeze out air bubbles and excess compound. The tape should lie flat without wrinkles.
-
Apply 2 to 3 feathered finishing coats. Let the bedding coat dry completely (usually 24 hours). Apply a second coat with a 6 inch knife, extending 2 to 3 inches beyond the tape edges. Feather the edges thin so they blend into the ceiling. After drying, lightly sand any ridges. Apply a final coat with a 10 inch knife for an even wider feather. Sand smooth when dry.
-
Prime and paint to match. Brush or roll primer over the entire repair area. Primer seals the compound and prevents flashing where new paint would otherwise look different. Once primer dries, apply ceiling paint that matches your existing finish. You may need two coats for even coverage. Feather paint edges to blend seamlessly.
Pro Tip: Apply joint compound in thin layers rather than trying to fill everything at once. Thick applications crack as they dry and create visible bumps. Multiple thin coats feathered wide produce invisible repairs that feel smooth to the touch.
For ceilings with texture, you'll need to recreate the pattern before painting. Practice your texture technique on cardboard first. If matching complex textures feels daunting, professional ceiling painting services can handle this finishing step to ensure your repair disappears completely.
Troubleshooting and when to call a professional
Even careful DIY repairs sometimes fail. Common mistakes include skipping surface preparation, applying compound too thickly, insufficient sanding between coats, and ignoring the crack's underlying cause. If your repair bubbles, cracks reappear within weeks, or the patched area looks obviously different, the problem likely runs deeper than surface cosmetics.
DIY is viable for hairline cracks but professionals are essential when cracks indicate structural or water damage issues to avoid recurrence. Attempting DIY fixes on serious problems wastes time and materials while letting damage worsen. Knowing when to call experts protects your investment.
| Repair Aspect | DIY Minor Crack Repair | Professional Structural Repair |
|---|---|---|
| Crack width | Under 1/8 inch | Over 1/8 inch or widening |
| Crack pattern | Straight along seams | Stair step, horizontal, or radiating |
| Associated damage | None | Water stains, sagging, soft drywall |
| Recurrence | First occurrence | Returns after previous repairs |
| Cost | $70 to $150 materials | $200 to $500+ depending on scope |
| Warranty | None | Often included with professional work |
Seek professional help immediately if you observe cracks wider than 1/8 inch, cracks accompanied by water stains or discoloration, sagging ceiling sections, or cracks that return in the same location after repair. These signs indicate problems beyond cosmetic damage. Foundation issues, roof leaks, or structural movement require diagnosis and correction before surface repairs will hold.
Experts recommend paper tape for durability and using screws for reinforcing loose drywall where cracks recur. Professionals also identify whether cracks stem from truss uplift, foundation settlement, or moisture damage. They can install additional fasteners, sister joists, or address underlying moisture sources that DIY methods can't resolve.
Dallas–Fort Worth's expansive clay soils cause ongoing foundation movement that standard repairs can't prevent. Professional contractors familiar with local conditions offer solutions like foundation stabilization, drainage improvements, or flexible repair methods that accommodate seasonal movement. Many provide warranties covering their work, giving you recourse if cracks return. For water related ceiling damage, specialized ceiling water damage restoration services address moisture sources and structural repairs simultaneously.
Finishing touches: painting and maintaining your repaired ceiling
Proper finishing makes repairs invisible. Always prime the repaired area before painting. Unpainted joint compound absorbs paint differently than surrounding drywall, creating a dull spot called flashing that announces your repair. Quality primer seals the compound and creates uniform paint absorption.
Choose paint that matches your ceiling's existing finish and sheen. Most ceilings use flat or matte paint, which hides imperfections better than glossy finishes. If you're unsure of your ceiling's paint type, take a small sample to a paint store for matching. Buy enough paint to cover the entire ceiling if your repair is large or if the existing paint has yellowed with age. Painting only the patch often leaves a noticeable color difference.
Blend your repair by feathering paint edges beyond the primed area. Use a roller for large repairs and a brush for detail work. Apply thin coats rather than heavy coverage. Two thin coats blend better than one thick coat. Let each coat dry completely before assessing whether you need another.
For textured ceilings, recreating the pattern requires practice and the right tools. Knockdown texture uses thinned joint compound applied with a roller or spray gun, then lightly flattened with a knife. Popcorn texture needs a hopper gun and specific popcorn compound. Orange peel texture comes from thinned paint or texture material sprayed in a specific pattern. Each texture type demands different technique and tools.
Pro Tip: If your ceiling has a complex texture you can't match, consider hiring professional ceiling painters for this final step. They have the tools and experience to recreate textures invisibly, ensuring your careful repair work doesn't get undermined by mismatched finishing.
Maintaining your repaired ceiling prevents future problems. In DFW's climate, inspect ceilings seasonally, especially after periods of heavy rain or extended drought. Clay soil movement peaks during these weather extremes. Look for new cracks or widening of repaired areas. Catching problems early allows simple touch ups before they become major repairs.
Control indoor humidity to minimize ceiling stress. Use dehumidifiers in humid months and ensure bathrooms and kitchens have working exhaust fans. Excess moisture causes drywall to expand and contract, stressing repairs. Address any roof leaks or plumbing issues immediately. Water damage destroys drywall and creates conditions for mold growth.
For comprehensive guidance on maintaining painted surfaces and recognizing when touch ups are needed, review painting techniques guide resources. Regular maintenance extends the life of your repairs and keeps ceilings looking fresh. When you need professional help with larger projects or challenging finishes, ceiling painting services provide expert results with proper surface preparation and durable materials.
Reliable drywall repair and painting services in Dallas–Fort Worth
When ceiling cracks exceed DIY capabilities or you want guaranteed professional results, House Painting Triforce delivers expert drywall repair and interior painting throughout the Dallas–Fort Worth area. Our team handles everything from minor crack repairs to extensive ceiling restoration, ensuring surfaces look flawless and repairs last.

We understand DFW's unique challenges, from expansive clay soils to humidity swings that stress ceilings. Our comprehensive services include drywall patch and repair in Dallas, precise texture matching, and expert finishing. We prepare surfaces properly, apply materials with attention to detail, and deliver results that blend invisibly with existing work.
Our interior house painting Dallas services complement drywall repairs perfectly. After fixing cracks and damage, we can refresh entire rooms with quality paint that protects and beautifies your home. For ceilings specifically, our professional ceiling painting services ensure even coverage, proper texture matching, and finishes that make repairs disappear.
We provide convenient scheduling, reliable communication, and warranties that give you peace of mind. Whether you need a single crack repaired or complete ceiling restoration, our experienced team delivers high quality results without hassle.
FAQ
How do I tell if a ceiling crack is serious?
Cracks wider than 1/8 inch, longer than 12 inches, or accompanied by water stains need professional inspection. Horizontal cracks near walls or stair step patterns suggest structural concerns rather than cosmetic issues. Sagging sections or soft drywall around cracks indicate moisture damage or failing structural support. For assessment of more extensive damage, review ceiling hole repair guidelines to understand when professional evaluation is necessary.
Can I fix ceiling cracks myself or should I hire a pro?
DIY methods work effectively for minor hairline cracks under 1/8 inch that run along drywall seams without accompanying damage. Professional help becomes crucial for wider cracks, recurring cracks, or cracks with water stains, as these indicate structural or moisture problems requiring expert diagnosis and lasting solutions. Professionals also provide warranties and have experience with DFW's soil conditions. Explore home repair guides to determine which projects match your skill level.
What maintenance helps prevent ceiling cracks from returning?
Inspect ceilings seasonally, particularly after heavy rains or drought periods common in Dallas–Fort Worth, to catch new or growing cracks early. Control indoor moisture with dehumidifiers, exhaust fans, and proper ventilation to minimize drywall expansion and contraction. Fix roof leaks and plumbing issues immediately to prevent water damage that weakens drywall and creates structural problems. For water related issues, ceiling water damage restoration services address both immediate damage and underlying moisture sources.
How long does a DIY ceiling crack repair take to complete?
Most minor crack repairs require 3 to 4 days from start to finish due to drying time between compound coats. The actual work time totals 2 to 3 hours spread across multiple days. Plan one day for preparation and first coat, another for second coat, a third for final coat and sanding, and a fourth for priming and painting. Rushing the process by applying coats before previous layers dry fully causes cracking and poor adhesion.
Why do ceiling cracks keep coming back in the same spot?
Recurring cracks indicate an underlying problem that surface repairs don't address. Common causes include foundation movement from expansive clay soils, roof leaks creating moisture damage, insufficient drywall fasteners allowing movement, or truss uplift from temperature differences. Professional evaluation identifies the root cause so repairs address both the symptom and the problem, preventing endless repair cycles.